1998 Dodge Durango Driver Seat Rocking Chair Fix
If your driver seat moves back and forth, then this is the fix for it.
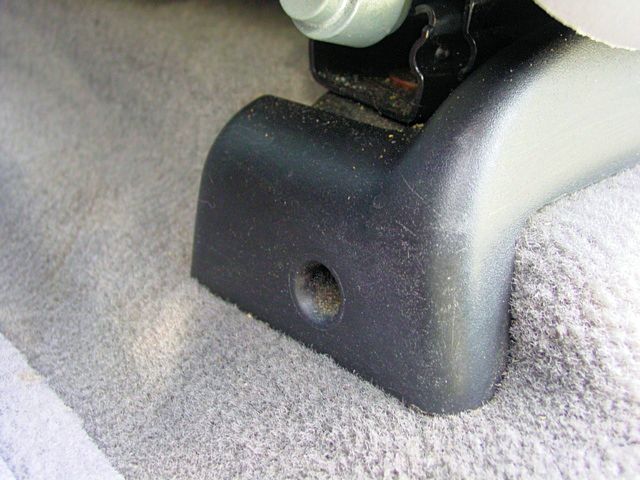
There is a worm gear on both sides of the seat and each one has an aluminum piece that hold a special nut. From the factory, there is a rubber grommet which is a filler to keep the special nut from sliding back and forth. This grommet deteriorates over time and becomes a sludgy mess with the grease. You may or may not see what is left of it. I did see some of mine.
The gap it leaves behind is 3/16" thick as you will see in the pics below. This gap is what causes your seat to slide back and forth, the affect of a rocking chair. The washers I listed below should fill this gap in perfect, as it did on mine.
This fix took me one and half hours total and that included taking pics for this write up.
The reason I have done a completely new write up as the others is that my seat was little different in that it had a few torx head bolts where the other write ups listed regular hex head bolts. This was a real easy fix and it seems the longest part was removing the seat and putting it back in.
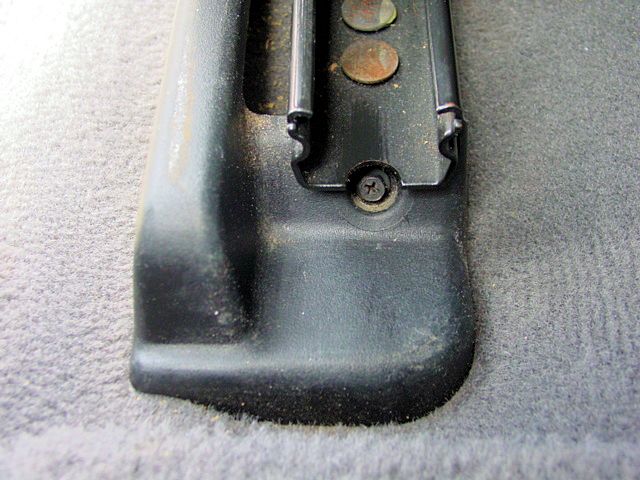
Note: See the two flat head rivets above? There are more of these down the track and will cause the worm gear to be alittle bit of a pain to remove as I will explain later in the fix. The aluminum piece catches them and has to be slide past them both removing it and replacing it. So when you feel the worm gear assembly hitting on something, it is these rivets. |
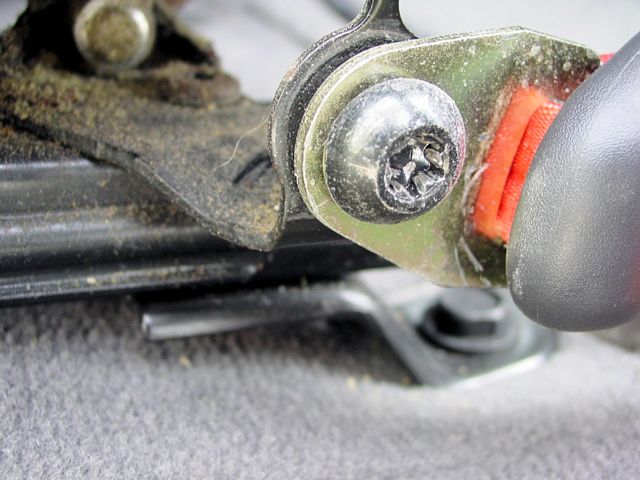
 Here is the back left one that needs to removed. |
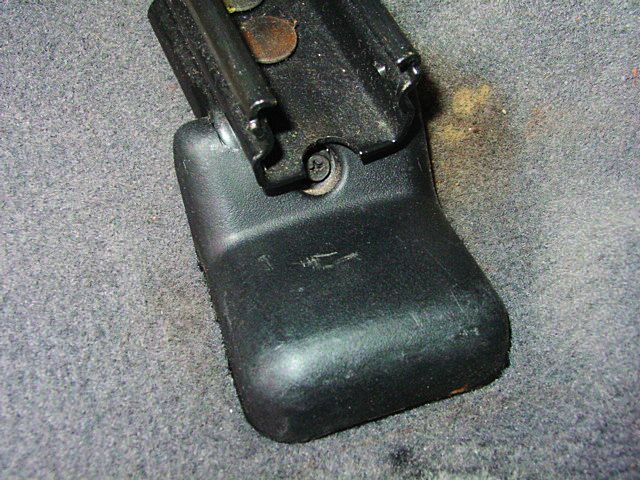
 This is the front part of the long trim piece, once oyu remove both front and rear screws, you can remove the piece. To get to this one easily, just move the seat to the rear. |
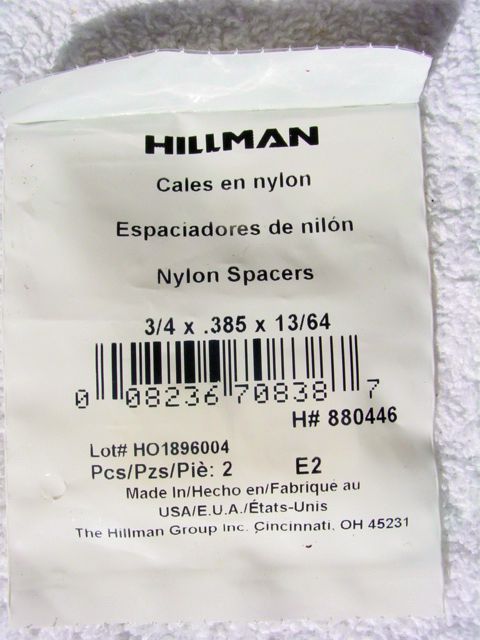 This is the package that the Nylon Washers come in. All you need is one package. I got these at Lowes in the Speciality Drawers, big blue ones by all the other bolts, washers and such. They cost $1.39 The width says, 13/64, but it is so close to 3/16" that I refer to it as 3/16" later in the fix. |
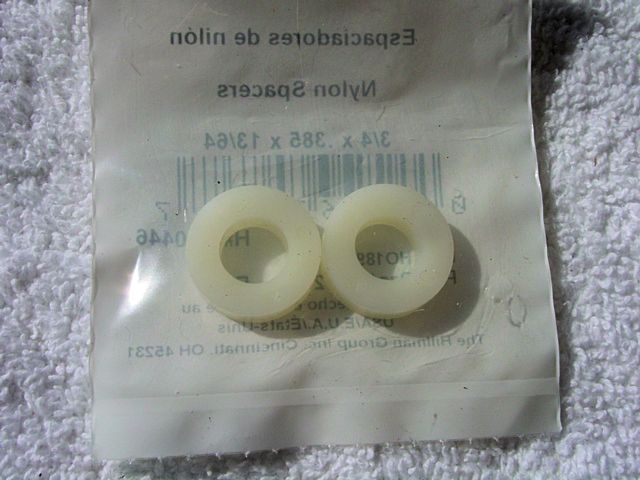 |
 I took a 7/16 drill bit and drilled them out. They need to be that size so the worm gear will easily move through them. The one on the left has been drilled. |
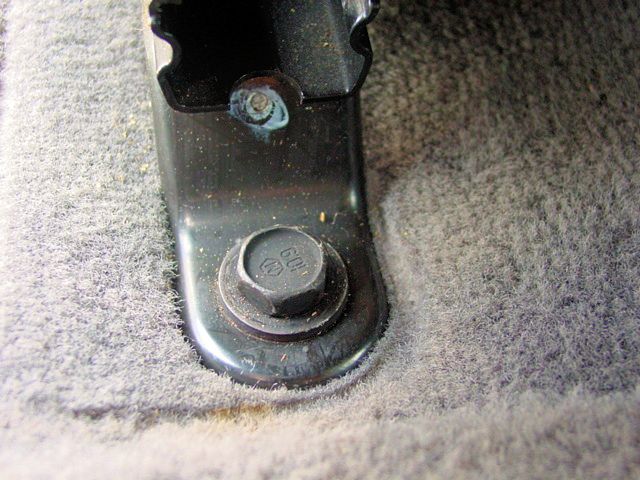 One of the rear bolts to remove. It is an 18mm These bolts are fine thread and can be hard to remove, so take your time and to make it easier, use a 1/2 socket setup. Note: After you remove the back bolts, then slide the seat ALL the way back and leave it there. This will come into play later in the fix. |
 Front bolts are 13mm |
|
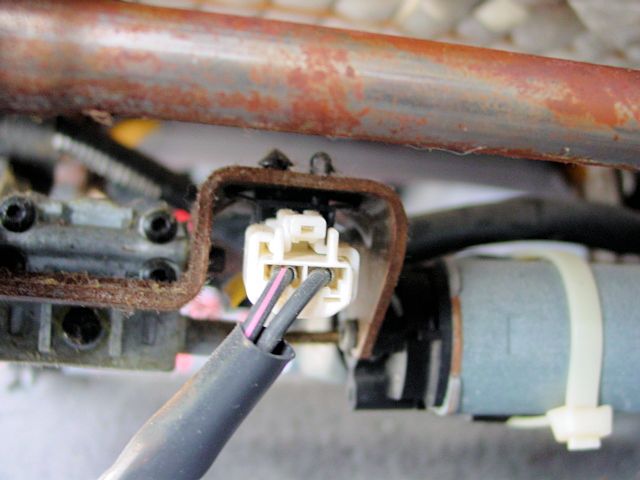 Once all bolts are removed, then lean seat forward and you can simply unplug it. |
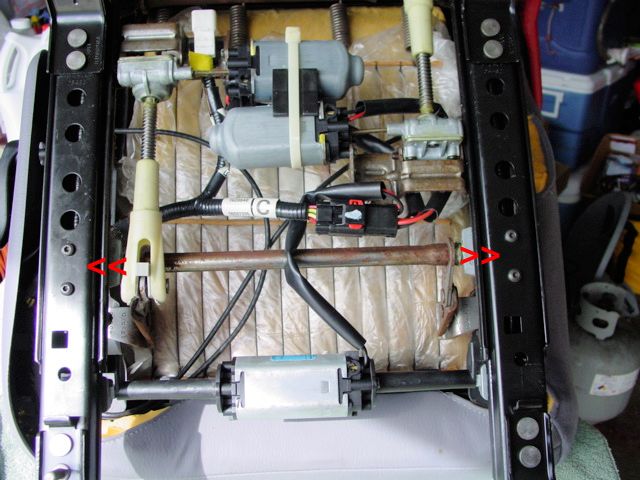 The red arrows show the 4 torx bolts that need to be removed. Only do one side at a time, as it is easier to keep everything in alignment that way. These torx are T-27 Once you remove them, it allows the track to move freely up and down. They are actually bolted to the aluminum peice you will fix later on. These rails do not come off though, so do not try to remove them. |
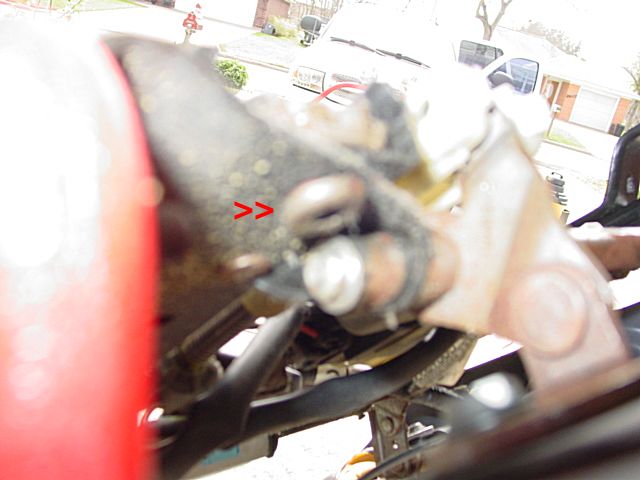 I apologize for the blurry pic as I had installed the seat before I realized the quality. The arrows point to the torx head bolt (T-27) that you must remove to be able to remove the worm gear assembly. I have seen other write ups where this is a hex head bolt, so this shows some years and/or models are a little different. This bolt is located at the back of the worm gear, underneath. |
 To make it easier to get to the torx head holding the worm gear in the above pic, you must remove these two torx heads (T-45). That way the asembly will lift up just enough to remove the worm gear torx head bolt. Once you look at it and the space you have you will see what I am talking about. The worm gear will slide out from the rear of the track and takes a little work to remove it. Both the worm gear and the track can slide together to help remove it and at some points the worm gear needs some good jerking to remove. It is the same way to re-install, it can be a little bit of a hassle to do, but it is easy to figure out. |
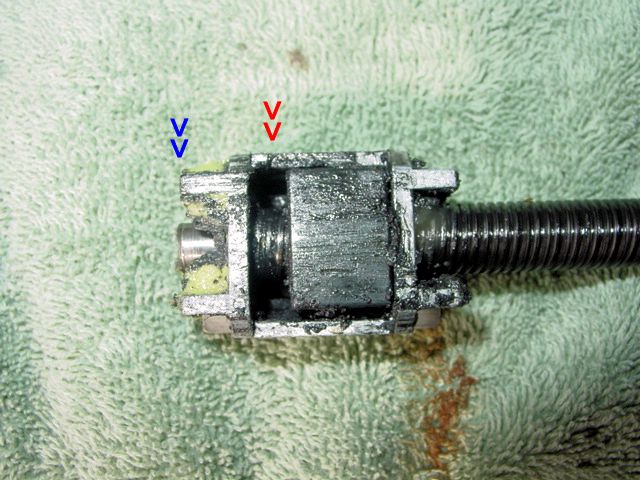
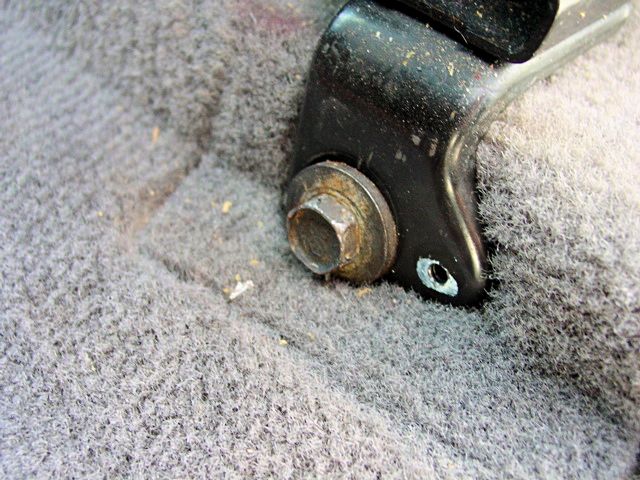
The red arrows show where the rubber grommet (spacer) used to be. This is the gap that needs to be filled in with the new washer. Without it, you can see how the seat slides back and forth 3/16 of an inch. |
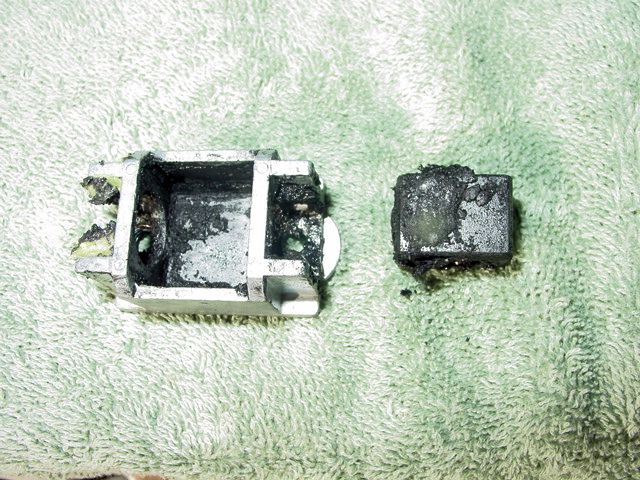 This is showing the bottom side of the nut. You can see what is left of my spacer as it has just about became one with the grease. A good cleaning is good at this point of both pieces. |
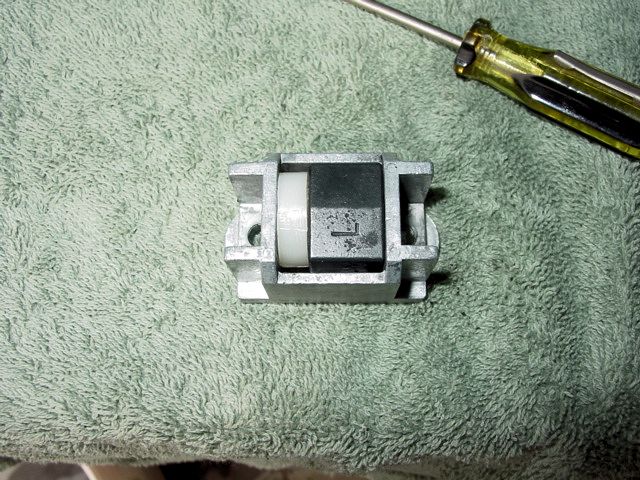 After cleaning and with the new nylon washer in place. Notice the "L" stamped on it? You can also see where the two torx head bolts that hold the track to this piece are located. |
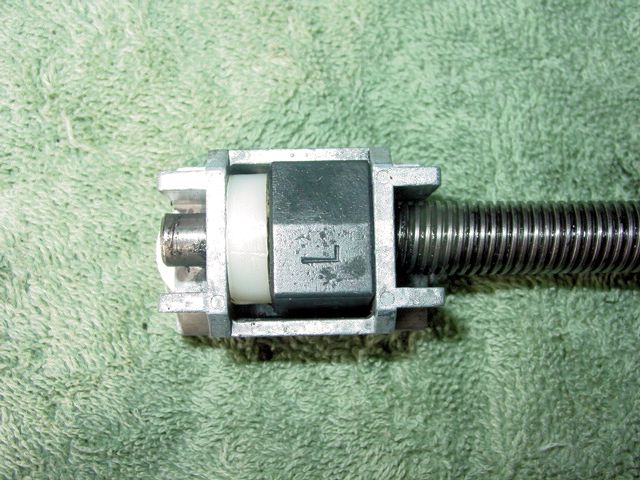 With the worm gear screwed back in place. Notice the end of the worm gear is screwed back to where it was before I removed it? You will have to adjust this on both sides, which the next pic shows. This is because now the new washer is in place, so the 3/16" slack is now gone. If you try to installed this now as it it is, even though it is adjusted exactly like it was before it was removed, the overall length of the worm gear would be 3/16" longer and the bolt at the other end would not fit. |
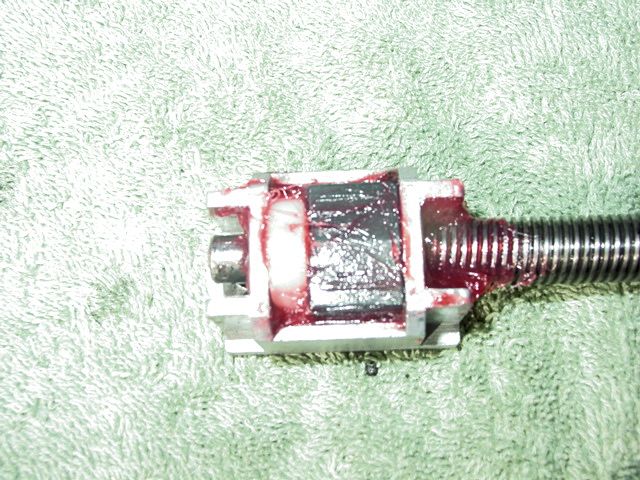 Here it is with new grease on it. I put the new grease on first and then adjusted it in the pic below. That way I could make sure the nylon washer moved freely. |
|